Photographing People who don’t like being Photographed
I recently did a shoot which reminded me how some people just don’t want to be photographed…
Many people would never book a shoot for a number of reasons, but usually because they are too nervous. My partner’s goddaughter, 24-year-old Kate, was quite reluctant when I offered to do a shoot. Kate is really pretty, so why would she not want to do it?
Kate’s comments:
“Having a proper photo shoot would feel vain, and I wouldn’t want pictures of myself around the house. Also it sounds like it would be really posy – I would rather have a natural photo that someone just happened to snap. A proper photo shoot would be me just on my own – so I’d be self-conscious. I’m not a model – so I wouldn’t know how to act, and wouldn’t want to disappoint you because I have no idea what to do, and don’t think I’d be good enough at posing, etc. If my parents wanted a family photo then I would do it because it would be the whole family, so I wouldn’t feel so much attention on me.”
Of course I instantly saw this as a challenge!
So how did I persuade her?
I told her that she would be the first one to see the pictures, and if she didn’t like them she could delete them all!
I promised her she wouldn’t have to pose, and that I would tell her exactly what to do, so she wouldn’t feel self-conscious.
I explained that when I photograph people, I look at them carefully to work out where they look best and I promised I wouldn’t take a picture if I didn’t think she looked good in it. That we would experiment and work it out together.
I told her it wouldn’t feel like a photo shoot, it would feel like a fun day out!
This is nothing unusual – I find I usually have to direct everyone. No matter how confident they are, people usually feel a lot more confident when I tell them they won’t have to pose – they instantly seem to relax. Sometimes it’s important to sit down and discuss people’s fears about photography first too, and reassure them that you will do everything for them, and that it will be a much better experience than they think.
IMPORTANT – tell them they need to trust you.
I also choose the clothes with them, so we can decide together which colours and shapes will look good – and this helps to relax them as well.
I have made two videos of the shoot to show you – one of the “settling in” shots – which I deliberately shot at home first, with no one else around (except her Mum with the video camera!). The reason for this was that Kate would have been very very nervous if anyone else was watching. I wanted to break her in gently! And then when I felt she was getting more relaxed, we would venture outside the garden (Video 2).
Kate’s comments:
“When I was getting ready I felt really nervous – if you said I didn’t have to do it now, I’d have been relieved!”
I started in my usual style – under a porch roof to create soft, even and flattering light.
The shots above are carefully composed and every bit has been directed – from the body position, the angle of her head, even to where she is looking and whether she is smiling or not.
During the shots, I am always giving encouragement and being in control, so that she can start to relax and realise she doesn’t have to do anything.
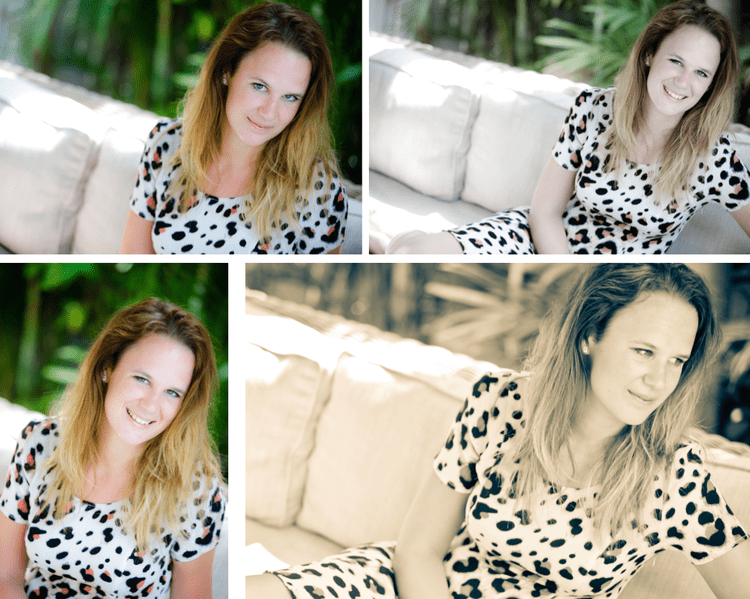
Start in smarter clothes
I tend to start with people in their smartest clothes, because this makes them feel different, particularly if they are nervous. You’d think they would be more relaxed in their casual clothes, but I often find that people don’t think they will look as good if they haven’t made an effort and dressed up for the shoot, therefore feeling their best. Of course in reality it is usually the shots at the end when they ARE in the most relaxed clothes that usually look the best! But from experience, I find it works better if I start smart, and work towards casual.
After about half an hour of experimenting and directing, Kate starts to relax because she realises she really doesn’t have to do pose – I’m trying out all sorts of things, and telling her what to do.
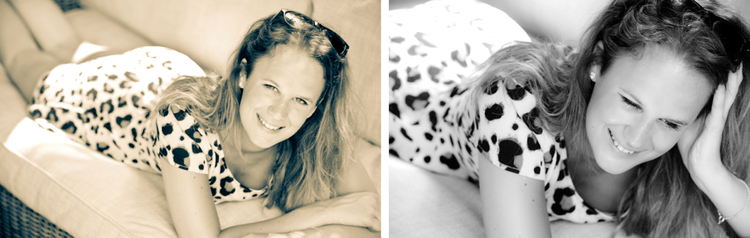
In the shots above, I started by asking her to lie on her front and fold her arms (left) and then I asked her to lean on one arm (right), then said, “say smelly socks!” – it’s such a stupid thing to say at this age – that she just bursts out laughing – and that’s all I need to get a shot which makes her look really relaxed!
Kate’s comments:
“During the first set of pictures on the sofa, it took about 30 seconds to make me feel comfortable, because you gave instructions all the time, so I didn’t feel like I was on my own trying to pose – you were telling me what to do all the time – I liked this because when I didn’t know whether to smile or not, you told me what to do, so I definitely started to relax.”
I now decide she’s ready to brave the outside world! Although she’s not quite so sure!
Check out the 2nd video below to see the rest of the shoot. I’ve deliberately left a lot of footage in here so you can see how much I am directing her, and how little she has to pose or do anything herself – in order that she enjoys the shoot rather than fears it.
Symmetrical staircase
We change outfits and wander out into the street where there is a wonderfully symmetric building that will work well as a background.
As you can see in the video, I ask her to stand in front of it, and then experiment with my angles, also moving her slightly, to create a range of shots.

Above: A range of different shots has been achieved by moving my own position from straight on (top left), to shooting from the floor (top right and bottom left). And then moving Kate to the staircase (bottom right). The different effects are all presets in Lightroom.
Next I ask Kate to sit on the steps, as I love the shape of the staircase and awnings.

I place Kate wherever I think she looks good as a shape within the shapes around her – there are so many different angles to choose from!
Palm trees and traffic!
By now Kate is just following instructions, even though I know she still feels very conspicuous! We turn around to use the background of palm trees opposite the staircase we’ve just been using, and on the other side of a very busy road!
I practice getting her into position while the traffic roars past, and then as soon as there is a gap, I shout out instructions and take the shots!

Not a car in sight! On one of the busiest intersections in Key West (check out the video!)
Kate’s comments:
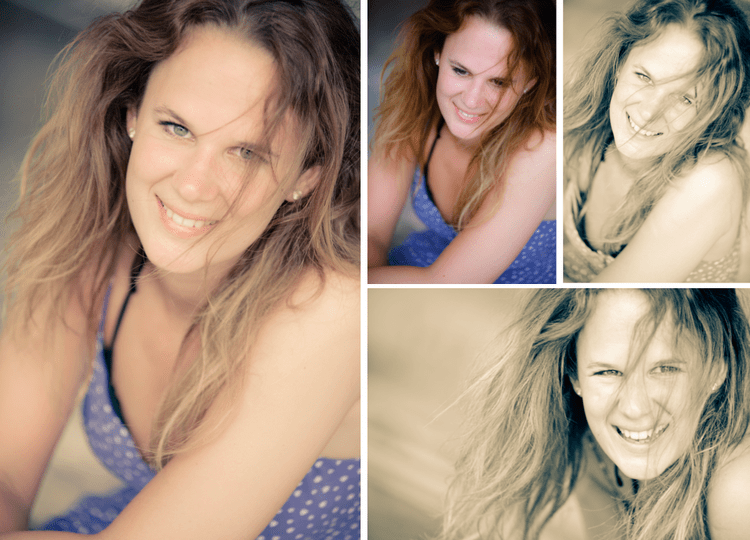
“When we were out on the road I felt a bit silly because I was trying to be ‘modelly’ – I thought I wouldn’t look good because there were so many people driving past and watching. Once we got to the blue painted building, we were away from people looking, and I was also more comfortable because we’d been doing it for about an hour or so and I was surprised to find I really started to enjoy myself!”
This is one of my favourite backgrounds of all time! The light is just stunning in this building due to the top shade of the roof. The colours of the peeling paint are beautiful, and the broken windows allow great compositions. I first used it on my intro video for this website – any day now someone will renovate it, and it will be gone forever.

I love the colours and texture in this building – and the light is just amazing.

Here, I’ve experimented by placing Kate in different areas, and composing to include different parts of the background. Again, I’m looking for the way I think the shapes work best together.
Windswept
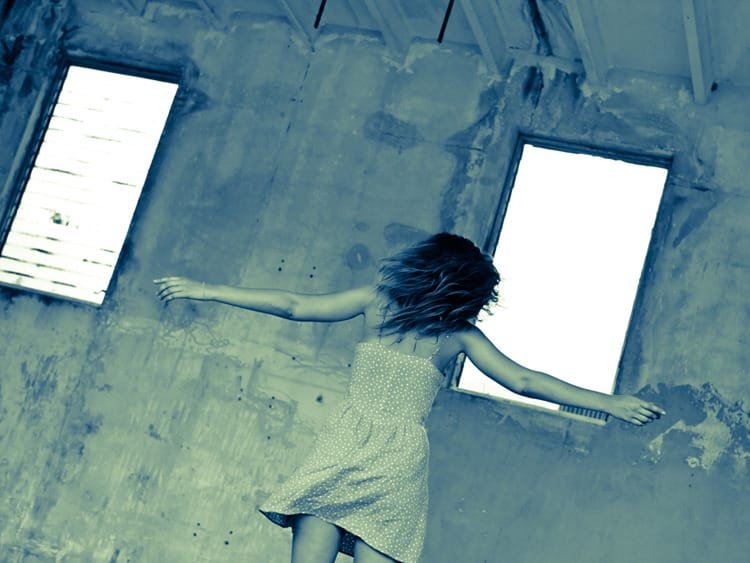
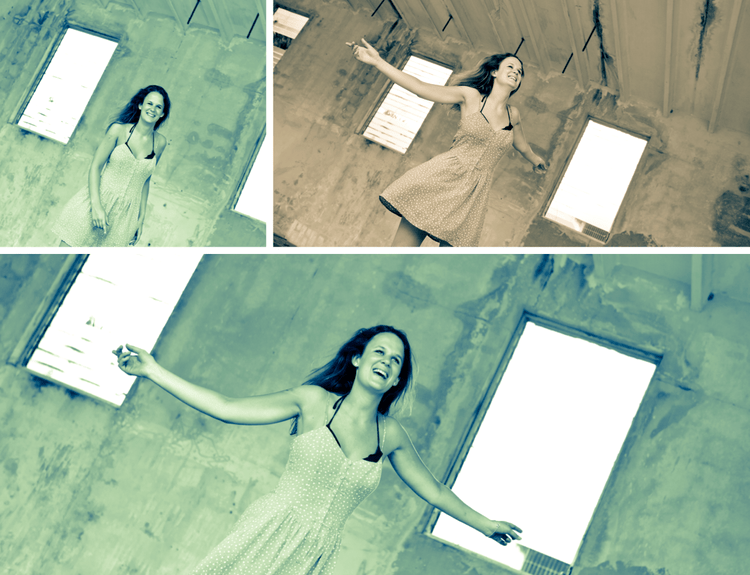
This is a look I often use to give the feeling of movement, when actually she is sitting quite still and the wind is calm. I ask her to crouch down, and then I purposefully place pieces of hair over her face – which gives a very natural windswept look to the shots. Sometimes, if you’re lucky, the wind actually does blow and it can be even more effective. Crop in tightly and angle your camera for the finishing touch.
Next we try twirling around to get another kind of movement into the pictures. Kate clearly feels very silly doing this, but it results in what I feel is the best shot of the day! It would have been very difficult to persuade her to do this at the beginning of the shoot – building up her confidence first really helps.

I just love this shot! It’s just one of those great moments where her hair looks fab, her arms are in just the right position and I love the movement in her dress. The Lightroom preset is Cyanotype – which is really effective here.
Even though Kate didn’t want to do the shoot, and I had to really persuade her, she did say she actually enjoyed it in the end!
Kate’s comments:
“After the shoot, I was really excited to see the results, but just before seeing them I was suddenly really nervous again, and worried about how I was going to look. I was very relieved and quite surprised – they were nothing like I imagined! I was really glad I did it! I will definitely put them on Facebook, and might even let my mother put one in the house!”
Believe me, so many people feel the same way. And sometimes you have to be firm, and very directional to give people the confidence they need. You have to believe in yourself so that they believe in themselves – however much they think they might not like the shoot or the results, if you take control and work together, – they will be pleasantly surprised in the end.

EXTRA TIP: It’s really useful to find a place where you can shoot with several backgrounds in close proximity, without having to travel around to different locations. I find for very nervous people, this works really well because they don’t get the chance to get nervous again in between locations – you are literally shooting in one place, then walking across the road to the next. Try it – it definitely helps!

Above: Using a location with several backgrounds in close proximity helps to keep the shoot flowing.
Many thanks to Kate’s Mum, Wendy, for her fantastic first-ever video! And of course to Kate for letting me persuade her to do the shoot in the first place!
Video: Wendy O’Brien / Editing: James Robinson
Camera: Canon 1Ds Mark 3 with 75-200 IS lens – Canon 5D Mark 2 with 35-70 IS lens.
Camera Settings: ISO 400, AV F5.6 – F2.8, shutter speed – whatever comes up! Check out: Set up your camera the easy way… for more details.