Wedding Shoot in Key West Cemetery

Often I do shoots just because I am inspired by something random. Last Halloween I met Maria in a bar, dressed in her wedding dress with a bunch of dead flowers and fake blood running down her face! She looked fabulous!
I was instantly inspired and asked her if she would like to do an alternative photo shoot in her dress.
I didn’t want to do a traditional wedding shoot – I was inspired by her “dead bride” theme after all! There is a wonderful old cemetery in Key West – very unique for having it’s coffins above ground, and lots of dead flowers adding muted colour everywhere, creating an amazing environment for a shoot.
We also decided to add an old American car (1965 Thunderbird for those who are interested!), and went off to see what we could create together!

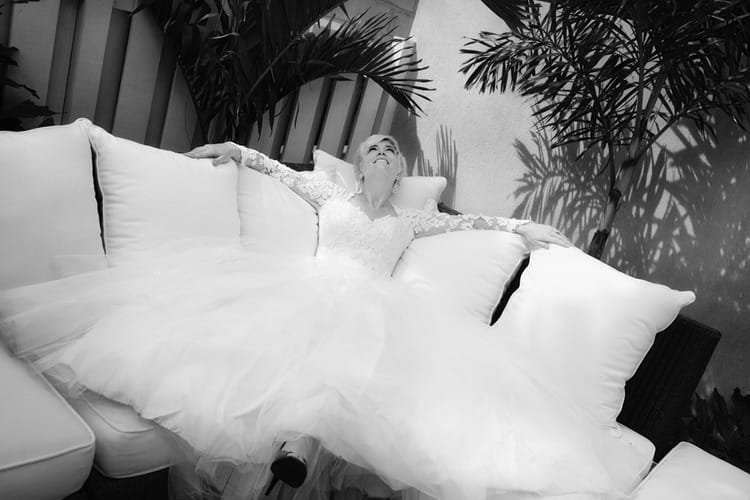
As with all my shoots, I started in the client’s home, so she could get used to being photographed before being let loose in the cemetery, and in the public eye, which can often cause clients to get embarrassed and stop being relaxed. Starting at home helps me to move her around in controlled lighting, and see how she looks best, so I can get a feel for how I am going to shoot later.


The picture on the left was shot on the DSLR, and the one on the right on the iPhone 4S (Hipstamatic app).
Key West has beautiful light and sunshine most of the time, but bright sunlight can be really tricky when shooting people. The sunshine is great splashing around the background, but is not flattering for faces, as it shows up every line, and makes people screw their eyes up. I only ever shoot in direct sunlight if the subject is not directly facing me, to avoid the harsh unflattering shadows. Provided Maria is looking away from me, its fine, because she won’t squint, and the light can create amazing patterns, without being unflattering.
I therefore started shooting under the soft top shade of a large tree – this allowed the areas outside the tree to be washed with sunshine, but kept the skin tones soft and flattering. I love Maria’s red shoes, and wanted to show them off, hence the positioning (+ she has great legs, so why not?!).
Once Maria was really into the shoot and was starting to enjoy it, we brought in the fabulous car. I just love the colour of this car, against the white of the dress – it looks amazing. It enabled me to shoot all sorts of different compositions – some wide, some close – and all different angles.


We attracted plenty of attention and even ended up in the middle of a random group of people on a photography seminar – they certainly got more than they bargained for that day!

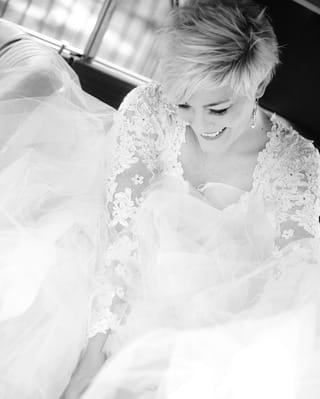
Image on the left: Shot on the iPhone app Camera+
When people are not models, it’s important to do everything for them, as far as possible. What I mean by this is that they need constant direction, in order to relax. You can’t expect them to perform for you, without direction. I see everyone and everything as a shape, and I basically rearrange those shapes so they look their best. This is why I start off with fairly static positions – where she is leaning on the car, moving her head one way, leaning another – I ask her to do those things, and move her around until she looks “right” to me. Then I take the shot.
Once I’ve done a few shots like this we can have more fun by doing something more active. But asking someone to run, or spin round is always going to result in some haphazard shots, so you have to be ready for them. To do this, I always set up the background first so it stays constant – here, we moved dustbins out of the way and constantly had to ask people politely to get out of the background! But I have my shape set up – so I know what’s at the edges of the shot – and I can work within that background. If you only focus on the subject, without thinking about what is behind them or around them, it is such a shame later when the shot would have been great – if only that dustbin hadn’t been in the background etc. So I set up the shot first, and then put the person in it. I can then shoot however I want, with all sorts of different angles, and concentrate on them, because I’ve already sorted out the background and the light.


Here I’ve set up the background, by positioning the car between the palm trees, and knowing I will work within this framework. So I can place Maria in the shot and concentrate on her, without worrying about what is happening in the background.

Swirling shots like these will be very hit and miss – I will take several photos and choose the best ones from them. Some will be blurred, and some will be out of focus – you have to accept that when shooting like this. Just throw those out later and concentrate on the best ones! And, no I don’t change the settings on the camera; they are still exactly the same! I focus and expose for the face and let the rest of the shot do what it likes! You do need a frothy type of dress though to achieve this blurring – because the fabric has to swirl round like this for it to work in this kind of shot. I did not lower the shutter speed here to create blur – it just happened itself because of the weight of the dress and the type of fabric.
My problem is that if I change the settings, I will then forget to put them back and I’ll end up with a lot of blurred shots later! It’s just the way my mind works – I have to keep the camera constant, so I can totally concentrate on what or who I am shooting.

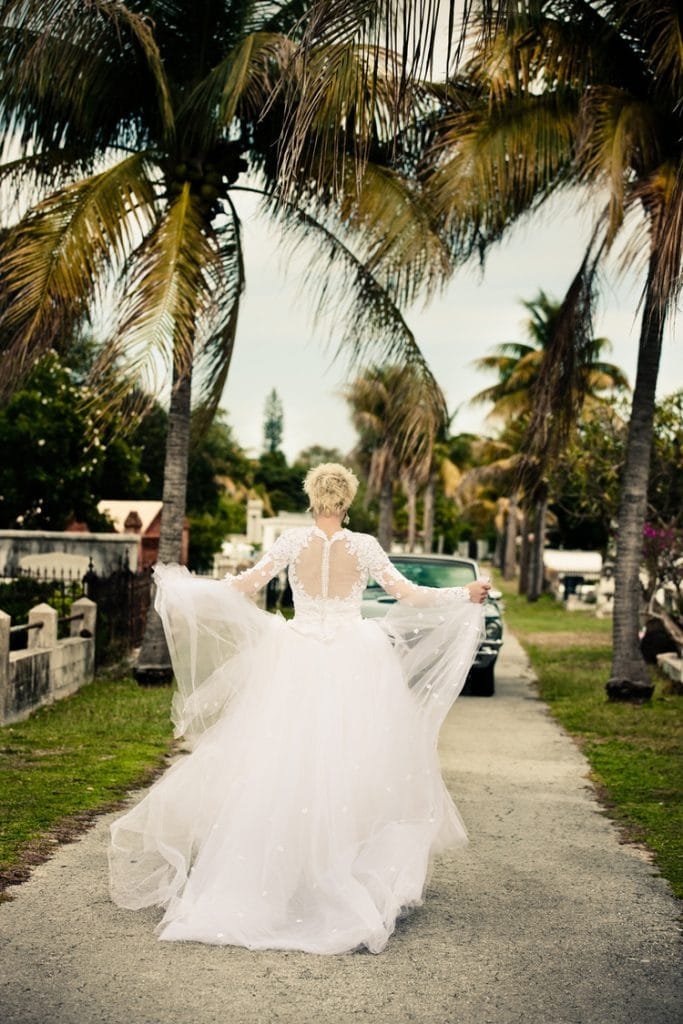
Once we’ve started having fun swirling in the dress, it’s on to running! Again we set up our background to create a good composition with the car and the trees. Then I tried three different options – running towards the car, past the car and then towards me.

NOTE – I’ve asked her to hold her dress at the edges as she runs, so she is holding up the skirt creating a good shape (giving her hands something to do), and showing off her legs and red shoes at the same time. It also stops her tripping up over the dress and falling flat on her face!


Tilting the camera at a very slight angle makes the shot look more interesting and dynamic, particularly when the subject is closer. In the wider shots I prefer to keep the lines straight to emphasize the lines of the car and the trees.
And once again, I haven’t changed any settings on my camera. Yes I could have used the setting that tracks the focus, to keep her in focus moving towards me, but guess what? I would then forget to change it back! If you can remember, then do it – whatever makes your life easier!
So I’ve just learnt to focus on the face all the time, and I know I will just throw out the ones that don’t work. I will never get it right every time – its the nature of this kind of shoot – you run around and have fun, and then repeat it, until you’re sure you’ve got some good shots! And all the time, the shoot gets more and more fun!
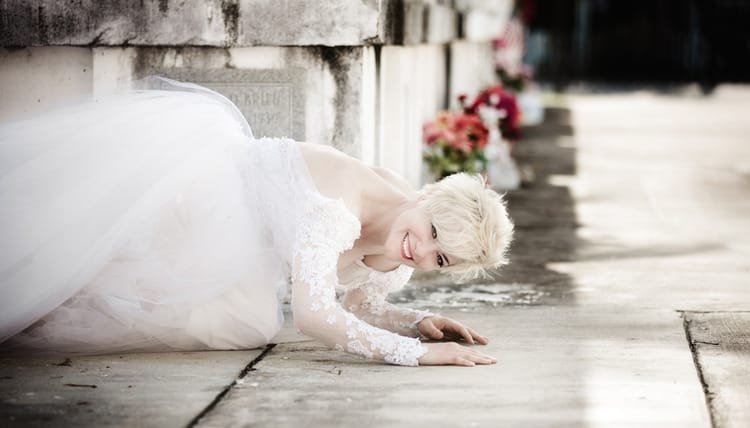
By this time, Maria is loving the shoot so much, I can ask her to lie on a dirty floor in a white dress, and she’s more than happy to oblige! It’s often hard to get to this stage on a real wedding day, because of time constraints and the fact that the bride needs to keep her dress clean! You tend to need to concentrate on two or three looks, so it’s fantastic when you have all day, without the pressure!

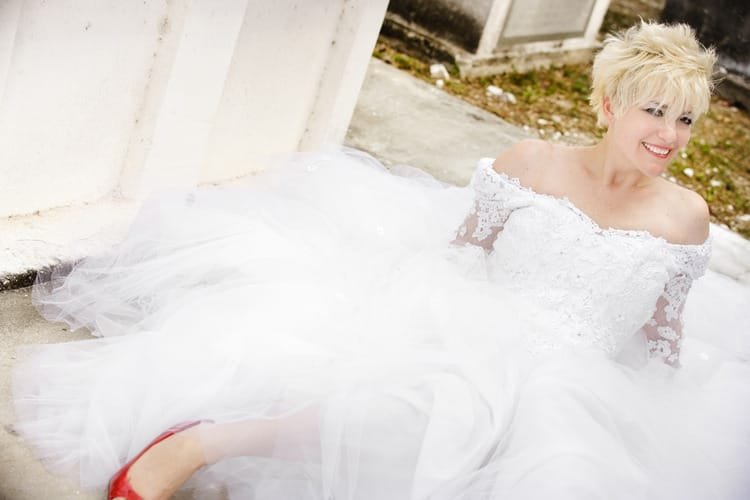
Most wedding dresses have an underskirt – so if you get the bride to sit on the underskirt and arrange the dress around them, the top of the dress will not get dirty. I have also dropped the shoulders on the dress to give these shots a more sensual feel.
Not only does she lie on the floor – I then get her to crawl around on her hands and knees – I don’t know why – I just thought it felt right at the time! And it certainly got her laughing. I don’t recommend you do this on a real wedding day! By the time we finished, this dress was not in good condition!

Oh… and the spookiest thing of all – I am walking down one of the paths to get a good angle on the shot – and what do I see to my right?
How spooky is that?! Certainly made me stop in my tracks.
What a great shoot – just had loads of fun! Thanks so much to Dan for lending us his beautiful car, to Maria’s husband, Dave for his great video and James for his wonderful editing! Hope you enjoy watching the behind-the-scenes action! I know not everyone has the sunshine and an amazing cemetery like this – but I hope you now have some new ideas from this for positioning real life brides (except for the tomb shot above!). Or maybe you can ask someone you know to go out and do a shoot with you – most brides will absolutely love the chance to dress up again and have a photo shoot – they often enjoy it much more without the pressure on the actual wedding day.
Equipment used:
For this shoot I took along two cameras, to allow me to work more quickly without changing lenses.
Canon 1Ds mark 3 with 70-200 2.8 lens
Canon 5D mark 2 with 35-70 2.8 lens
IPhone 4S (Hipstamatic and Camera + apps)
Settings used:
Both cameras were set up as I showed you in “Set up your camera the easy way…” – and all shots were taken on either F5.6 or F2.8.
Tips for shooting a bride in her wedding dress
Start at home first, or in a controlled environment, such as the front doorway of the house or hotel – somewhere the light is consistent, and there is no one around to watch and embarrass your client at this point.
Think of your subject, and the background as shapes. Move her around until she looks “right”. Don’t be afraid to ask her to move her head bit by bit, and then say stop when you think she looks her best. Don’t see her as a whole person – see her in parts. By this I mean – make sure her legs and body look good in that position, and then her head, and then her expression. I start looking from the feet up, and end with the expression.
Make sure you have checked every “edge” of your shape – move her hips around to see where she looks best in her dress – there is a big difference between straight on and slightly sideways – careful positioning is vital to get the most flattering pictures.
The position of her legs can make all the difference to the “shape” of the dress, even if you can’t see them. Try asking her to stand sideways, then put her front leg (one nearest camera) forward, and turn her toe towards the camera (think of how beauty queens stand – it’s a very flattering shape).
Check her hair and check her lipstick, constantly.
Once she is relaxed, you can do more active things! Try spinning her round in the dress, if it’s suitable. Show her what you want first, so she can copy.
Ask her to pick up the dress at the edges so she can swing it round more, to create movement.
Try asking her to run towards you – remember to check your background first, so you can shoot as you want without worrying about what is behind her.
Make sure you have breaks throughout the shoot – stop and have a coffee half way through, take some sweets and water for energy!
I constantly ask people to “look up to the sky and laugh out loud” – I then tell them “I know it feels stupid – but it looks fantastic!” Totally fake, but looks totally natural!


Video: By Dave Bootle / Editing: By James Robinson
Car lovingly loaned (and returned unscratched – phew!): By Dan Lotten
Make up/hair and dress: Model’s own!
